Kitchen Corner

August 14, 2015

Sambal Ikan Bilis Pumpkin Bun


These juicy and spicy buns are just so appetising. I used leftover Nasi lemak sambal to make them into buns for breakfast and some for cell group gathering.


Greedy me for adding too much sambal causing myself had difficulties to roll them and some even overflowed. 


The buns was made from pumpkin puree that gives nice color and soft texture too. During the baking, the whole house smell like a bakery shop and that's definately the pandan leaves which has enhanced the flavour.


Recipe makes 14 buns:
300g bread flour
90g plain flour
53g caster sugar
1/4 + 1/8 tsp salt
1 + 1/2 tsp yeast
53g whole egg
53g fresh milk
53g water
98g pumpkin puree
30g unsalted butter

Recipe for the sambal ikan bilis:
100g chili paste
12 shallots
8 gloves of garlic
2 thumb size of ginger
4 tablespoons of balacan
4 large red onion
2 big handful of asam soak with 1 1/2 cup water
Salt and sugar
1 1/2 cups of fried ikan bilis

Blend chili paste, shallot, garlic, ginger and balacan until combine. Fry it on a pan with some oil until fragrant and color turn a little darker. Add sliced red onion and keep frying then add the the asam juice. Season with salt and sugar. Stir in the ikan bilis powder. I fried them until the liquid reduced and color turn darker. Let them cool down on a plate before use.

For the dough, add all the ingredients in a bread pan except yeast and fit it into the bread maker. Turn on the bread maker. Choose program 11 and press the START button. Knead for 15 minutes. Restart the bread maker and start from program 11 again and add yeast this time until the machine stop with beep sound.

Turn off the bread maker then take out the bread pan and cover with cling film. Let it proof for 80 minutes.

Divide the dough into 14 equal pieces about 52g a portion. Roll to form 'ball' shapes, cover with cling wrap and rest for 15 minutes. 

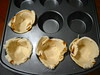
Flatten each dough and roll out into a round disc. Add the sambal at center of the dough. Shape them into ball shape and seal tightly.

Place the filled dough on a baking pan attached with baking paper. Press the dough to flatten them slightly. Cover them with cling film an proof for 40 minutes. After 30 minutes of proofing, preheat  the oven and start to wrap the dough with pandan leaves then use tooth pick to tighten.

Bake at 180C preheated oven for 15 to 20 minutes. Transfer to buns on a wire rack to cool.


August 13, 2015

Ogura Cake

This is the latest orgura cake I have made, swirled banana Ogura Cake

I did a few version of ogura cake in the pass but hasn't got achance to post it here for a record as my future reference. 

It is too soft until hardly stand still. That is also the reason I bake it in 7 inches cake pan and cause it grow taller.

Ogura cake is something like chiffon cake but the texture is much moisture, probably is the reason of steam bake. I don't appreciate ogura cake but chiffon, I don't know why?! However, using it as a cake base for celebration cake or added with fresh cream and berries to become a layer cake could change my appetite.

Strawberry cocoa ogura layered cakes

Recipe adapted from Min ' s Blog with little changes
Makes 7 or 8 inches square pan

Vegetable oil 45g 
(A)
Full cream Milk 60ml
Salt 1/4tsp
Egg yolk 100 g  
Whole egg 1 
Cake flour 65 g
(B)
Egg white 200g
Caster sugar 65g
Tartar powder 1/2tsp

For different colour and flavour (Add into the egg yolk batter) :

For green tea flavour - 1 teaspoon of green tea matcha powder mix with 15ml of hot water

For cocoa flavour - 1 teaspoon of varlhona cocoa powder mix with 15ml of hot water

For Banana flavour - Replace full cream milk to 70g mashed bananas


  1. Line the base of a pan with baking paper. Grease the side of the pan with butter and coated with flour. 
  2. Mix together ingredients (A). Set aside.
  3. Beat the egg whites until frothy then add the tartar powder. 
  4. Gradually add in the caster sugar in 3 batches and keep beating until stiff peak foam. The meringue is slightly curd to one side when the whisk is lifted up and presenting smooth shinny texture.
  5. Fold the meringue into mixture (A) in three batches until well combined.
  6. Pour into the prepared pan and steam bake at lowest rack at 160C preheated oven for 60 to 70 minutes. (I place a baking paper at the top of the cake when it rise up, set and turn brown to prevent the cake crack. I do it in 4 second with fast speed to control the oven temperature meaning not to let the temperature drops too fast.)
  7. After baked, remove the cake from the oven and unmould. Shake it a little to loosen and place a baking paper on top then place a plate on top and turn upside down. Remove the cake pan and place another plate on it and turn it back to cool on a wire rack.
  8. My family like to eat cold ogura cake so I place it in the fridge after it completely cool down at room temperature. Sometimes I like to add fresh cream in the between of the cakes with fruits. 
Cocoa marble ogura cake

Charcoal  Zebra ogura cake

Coffee marble ogura cake


August 12, 2015

Teddy Bear Cream Cheese Bun (BM)


There are so many nicely shaped and cute buns from Facebook, Instagram , Pinterest etc which are always looks attractive and make my hand itchy to make some for myself too. For this teddy bear buns, I got the idea from a blogger Nasi Lemak Lover. Using my comfort recipe 65C water roux dough with leftover cream cheese from the fridge to produce what I've got here. 


The buns texture is very cottony soft and even the next day, there got no chance to stay until the 3rd day anyway. I added 15g Valrhona cocoa powder for the dough and thought it was added too much and resulting the teddy bear was slightly dark in color. So next attempt  should reduce to 10g instead. Drawing the teddy bear face is quite challenging and I need more practice on that. The eye, nose and mouth is draw with melted chocolate chips and the white color parts made from icing sugar and egg whites as I don't have white chocolate on hand.


These little teddy bear is so cute after I have got the finishing drawing for their faces. Each of them looks different expression although they are all smiling.  


Recipe makes 9 buns at 8 inches baking tray

For the dough:
210g bread flour
56g plain flour
10g Valrhona cocoa powder
42g caster sugar
20g milk powder
1/2 teaspoon salt
6g yeast
22g unsalted butter
84g water roux
95g water
30g lightly beaten egg

For the fillings:

200g cream cheese
50g icing sugar
1 1/2 tablespoon whipping cream
1 teaspoon vanilla extract

Recipe for the water dough "water roux": Cook 125g water with 25g bread flour at medium low heat, keep stirring until it become thicken and no lumps left. Consistency should be like a thick baby porridge. Transfer to a clean bowl and cover with a cling wrap to avoid skin forming.

For the fillings, blend all the ingredients together in a blender or food processor until well combined. Transfer to a piping bag and keep refrigerated until ready to use.

Add all the ingredients in a bread pan except yeast and fit it into the bread maker. Turn on the bread maker. Adjust the timer to 0:00. Choose program 11 and press the START button. Knead for 15 minutes. Restart the bread maker and start from program 11 again and add yeast this time until the machine stop with beep sound.

Turn off the bread maker then take out the bread pan and cover with cling film. Let it proof for 40 minutes.

Divide the dough into 9 equal pieces about 55g a portion and 18 equal small pieces about 4g a portion. Roll to form 'ball' shapes, cover with cling wrap and rest for 10 minutes. 

Flatten each large dough and roll out into a round disc. Pipe out 25g cream cheese fillings at the center of the dough. Shape them into ball shape and seal tightly.

Place the filled dough on a baking pan attached with baking paper. Roll out the small pieces dough for the bear ears and place on each left and right dough and press slightly to stick. Let them proof for 40 minutes.

Preheat the oven to 190C. Bake for 25 minutes. Transfer to buns on a wire rack to cool.
Mix 25g icing sugar with 1 teaspoon egg white and a drop of lemon juice until well combine and become a thick paste. Transfer to a piping bag and draw a circle on each teddy bear face. Melt some chocolate chips and transfer to a piping bag to draw the eye, nose and mouth.


August 5, 2015

Marble Pound Cake


My son and I was craving for cakes yesterday. We are not looking for soft spongy cake but a rich buttery cake instead. After his afternoon nap, we tuck into the kitchen and quickly fast hand fast leg come out with this butter marble pound cake. With the little helping hands, I manage to do some weighing for the  following ingredients while he was holding the hand mixer to beat the butter and also do my washing at the same time. 

We are very happy with the result. My son can eat a big piece after his dinner and so do I, oh no I actually had 2 big pieces in one go. The cake is moist and soft, I mean not the spongy fluffy soft but you get what I mean about pound cake which is soft like easy to swallow unlike the stall bought one which will stuck between our throat. 


I guess the homemade yogurt make it moist too. The yogurt I made had stay 5 days in the fridge which become thicker and creamier. Beside, the sweetness is just right for us as the sour yogurt had balance up the sweetness. So if you like to try the Recipe,  please don't try to reduce any further as you still need some sweetness in there because it is still a CAKE. Another thing is I purposely use salted butter. We like our butter cake with a little salty that makes it flavourful. Not to forget, the little coffee in the cocoa batter is a bonus that gives extra flavour. Will make this again  when  we crave for buttery cake again and could be a gift too!


Recipe for pound cake pan 18 x 8 x 6.5cm

120g plain flour
1/3 teaspoon baking powder
120g salted butter
50g caster sugar
2 egg yolks
2 tbsp homemade plain yogurt
1 teaspoon vanilla extract
2 egg whites
50g caster sugar

Cocoa mix (2 teaspoon cocoa + 1 teaspoon instant granulated black coffee + 1 tablespoon warm water)

Grease and line the pound cake pan with baking paper. Shift the flour, baking powder and ground almond.

In a clean bow, beat the butter then gradually add in the caster sugar until the sugar dissolved into the butter and the mixture become fluffy and pale in color. 

Mix in the egg yolk one at a time and beat until just combine. Then  mix in the vanilla extract and yogurt until just combined.

In another clean bowl, beat the egg whites with a pinch of sugar until the bubbles appear then add 1/3 of the sugar. Gradually beat in the rest of the sugar until the egg whites become stiff peak foam. Gently fold in half the egg whites into the butter mixture, don't have to mix too much. Then mix in half of the flour ingredients and combine everything. Gently fold in the remaining egg whites then add the remaining flour ingredients until well combine. 

Take 1/3 of the batter to another bowl, mix with the cocoa paste until well combined.

Pour some of the plain batter into the pound cake pan and a few dollops of cocoa batter. Continue with the plain batter then the cocoa  batter until all batter fill the cake pan. Use a chopstick to run in the batter to give a quick swirl. 

Bake in a 180C preheated oven for 15 minutes.  When the batter set and it start to expand, open the oven door and use a knife to cut a line at the center of the batter, continue to bake for 40 minutes or until and skewer insert into the cake and come out clean. Be careful not to over bake the cake as you dont want a hard dry cake. 
Let it cool down on a wire rack and enjoy!


August 4, 2015

Nasi Lemak


Before I forget about the recipe, I better jot it down how I make this. If I'm not mistaken I've not making Nasi Lemak for more than 10 years. The last time I made it was bringing along for water fall picnic. As Nasi Lemak can be bought everywhere and anytime, I don't border to make it but I don't know what makes me to feel making it by myself again. I try to recall how I make them and I'm glad the result is good. The coconut rice is slightly soft as I purposely make it to suit my boy taste buds, he just want soft rice.  The sambal is very tasty with more gravy which is not too spicy and we can have more to go with the coconut rice. Serving Nasi lemak on  banana leaves is a bonus as the smell is so good. Anyway, the recipe is for my future reference just in case I got the mood to make Nasi lemak again and recipe is quite base to suit me and my family taste buds.

Coconut rice: 

1 cup of rice
1 + 1/4 cups of water 
1/2 + 1/4 cups of fresh coconut milk
4 strips pandan leaves
4 pieces ginger
1/2 teaspoon salt

Sambal:

50g chili paste
6 shallots
4 gloves of garlic
1 thumb size of ginger
4 teaspoon balacan
2 large red onion
A big handful of asam soak with 1 cup water
2 tablespoon powdered ikan bilis
Salt and sugar
Some fried ikan bilis
some toasted peanut
some slice cucumber
2 hard boil eggs

Wash the rice and add the water and coconut milk. Stir in the salt to combine. Add the pandan leaves and ginger. Steam for 50 minutes. 

Blend chili paste, shallot, garlic, ginger and balacan until combine. Fry it on a pan with some oil until fragrant and color turn a little darker. Add sliced red onion and keep frying then add the the asam juice. Season with salt and sugar. Stir in the ikan bilis powder. I fried them until the water reduced a little
and color turn darker.

To assemble, add a bowl of coconut rice on the center of banana leaves while the rice is still hot. Sprinkle the side with roasted peanut and fried ikan bilis together with slice cucumber and cut hard boil egg. Spoon some sambal on a small piece of banana leaves and place on the rice. Wrap them tightly and ready to serve.