Kitchen Corner

July 31, 2015

Cranberry Cream Cheese Bun


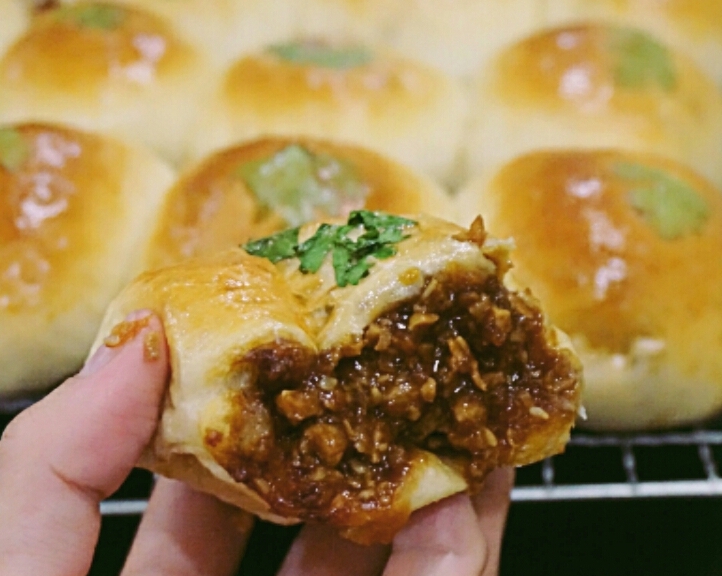
With my comfort 65C bread dough recipe, I came out with one of my favorite bakery cranberry Cream Cheese Bun. My family loves it, my cell group members enjoy it so I think it will be in my baking routine. So, why pay more if we could produce something similar as stall bought? 


Recipe makes 11 buns from panasonic bread maker

For the dough:
210g bread flour
56g plain flour
42g caster sugar
20g milk powder
1/2 teaspoon salt
6g yeast
22g unsalted butter
84g water roux
85g water
30g lightly beaten egg
50g cranberries

For the fillings:

200g cream cheese
50g icing sugar
1 1/2 tablespoon whipping cream
1 teaspoon vanilla extract

Recipe for the water dough "water roux": Cook 125g water with 25g bread flour at medium low heat, keep stirring until it become thicken and no lumps left. Consistency should be like a thick baby porridge. Transfer to a clean bowl and cover with a cling wrap to avoid skin forming.

For the fillings, blend all the ingredients together in a blender or food processor until well combined. Transfer to a piping bag and keep refrigerated until ready to use.

Add all the ingredients in a bread pan except yeast and fit it into the bread maker. Turn on the bread maker. Adjust the timer to 0:00. Choose program 11 and press the START button. Knead for 15 minutes. Restart the bread maker and start from program 11 again and add yeast this time. After 10 minuted add dried cranberry and continue for the kneading process until machines stop.

Turn off the bread maker then take out the bread pan and cover with cling film. Let it proof for 40 minutes.

Divide the dough into 11 equal pieces about 55g a portion and roll to form 'ball' shapes, cover with cling wrap and rest for 10 minutes.

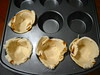
Flatten each dough and roll out into a round disc. Pipe out 25g cream cheese fillings at the center of the dough. Shape them into ball shape and seal tightly.

Place the filled dough on a baking pan attached with baking paper. Place another sheet of baking paper on top of the dough then place a baking pan on top. Slightly press down and let them proof for 40 minutes.

Preheat the oven to 210C. After the oven is preheated, place the baking pan together the top baking pan into the oven and close the door. Adjust the temperature to 190'C and bake for 20 minutes. Take out the top baking pan and baking paper continue to bake for about 8 to 10 minutes.

Take out the buns from the oven and cool on a wire rack. It's best serve on the day it made or warm it up by wrapped in an aluminium foil and tuck it into 200'C preheated oven for 10 minutes. It will taste as good as the day it made., soft and tasty!.


July 27, 2015

My favorite pancake mix


There are uncountable of pancake recipes and I believe you have your own comfort pancake recipe at home too. As for me, here is a recipe that had been with me for many years. I've forgotten where is the recipe source from, might be from one of my favorite blogger buddy. It was jot down in my little dairy and I have just realized it was not in my blog. This very soft fluffy pancakes is one of my favorite breakfast. I don't feel to pay more for having the same pancakes quality out there. 


Buttermilk Pancake recipe (makes 6 pieces)

110g plain flour
30g caster sugar
1/4 teaspoon salt
1 tablespoon baking powder
120ml full cream milk (room temperature)
1 tablespoon lemon juice
40g melted butter
1 large egg


Add the fresh lemon juice into the milk to infuse for at least 15 minutes to produce homemade butter milk. Right before use, shake it until thicken.
Melt the butter in a sauce pan. Set aside to cool. 
Combine all the dry ingredients in a bowl. Mix the egg into the ready made butter milk and melted butter. Gradually add the wet ingredients to the dry ingredients. Do not over mix, it is good to left a bit of lumps in the batter. 
Fry the batter at a medium heat on a non stick pan until little bubble form on the surface. Flip over to another side until cooked. Do nut over cook as you don't want a tough and hard pancakes. It is best serve warm just with a slice of nice cold salted butter with pure maple syrup.


Tips:

Add ham, cooked bacon, sausages or cheese into the batter before fry to produce savoury pancakes.

Add fresh blueberies and pinch of cinnamon for extra texture.

Make extra and keep in the freezer. Defrost at room temperature before             serve.

My favorite combo:  pure maple syrup with salted butter / peanut butter with backcurrant jam, cinnamon powder with salted butter / banana with nutella spread 

July 24, 2015

My all time favorite pizza dough

Pizza is one of the meal that I can cheat the kids to eat more vege. With the cheesy topping  that over powered all the vege inside the pizza., kids eat happily with finger licking good. If you are a mummy with a picky kid at home like me, you will get what I mean. 

My favorite seafood Tom Yam pizza. Prawn, squid marinate with Tom yam paste, salt, sugar, fish sauce, chili flakes, chopped corriandar and spring onion.

I like to make pizza because I find it quite easy for me. I have plenty of ready homemade pizza tomato sauce and bell pepper sauce in my freezer. So making pizza in a scratch is not a problem. I just need to finely grate some carrots, finely chopped mushroom, finely chopped steam broccoli etc and place on the dough before the cheese topping.  

I always have an odd pizza as I need to reserve a portion for my boy. He doesnt eat spicy and no squid for him too. Only vege and prawn for this time.

Here is the dough recipe has been with me for many years which is from 孟老师的一百道面包 

For the dough:
150g plain flour
150g bread floor
15g caster sugar
1/2 + 1/4 teaspoon salt
3g yeast
165g water
15g olive oil

Knead all the ingredients until a smooth dough and cover for 80 minutes proofing. (for panasonic bread maker use program 11 for 15 minutes kneading process)
Punch out the air and shape into a round ball again then rest for 10 minutes 
Roll out the dough as thick or thin as you like. Spread desire tomato pizza sauce or pasta sauce. Spindle some shredded cheddar cheese and add toppings like vege or meat or seafood. Sprinkle another layer of shredded mozzarella cheese on top. 
Let the dough rest for further 15 minutes. Bake at 230C for 15 minutes.

The pizza best serve while it is still warm as the bottom part is crispy and able to hold all the ingredients on top by using hands to eat. Once it cold down, the dough will turn soft like bread which my boy like it that way. As for me and my hubby, we like to reheat the bottom part of the pizza to make it crisp up again. Place the pizza on a pan, turn on medium heat on stove for about 3 to 5 minutes. It's  so good to have crispy bottom bread with gooey cheesy toppings. 


July 23, 2015

Overnight Oat


I have just started making my own overnight oat early this year. It's pretty late as many of you has been enjoying it  for many years. Well, late is better than none and I am really falling in love with it.


I'm not an oat person, it never come to my diet if require me to cook it and serve it warm. I simply don't like that texture but it's strange when it soak overnight in the fridge and serve cold that totally change my appetite. Adding dried fruit, nuts, fresh fruits and maple syrup that really change everything.


I really appreciate those bloggers who always publish their overnight oat that motivate me to try, or else I miss out something so yummy yet healthy diet in my life. Other than homemade yogurt, overnight oat is also become my daily diet no matter is breakfast lunch or dinner. Some of my friends tasted with good feedback and some even said it is like having dessert. As for me and my hubby, this quick meal very much fill our stomach with full of satisfaction.


How I made it:

To make 1 serving, mix 5 tablespoon rolled oat with 1/2 cup of full cream milk, 1/2 tsp vanilla extract, 1 tsp maple syrup (optional). Keep Refrigerated overnight.

My favorite combo: 
(Al
1 teaspoon  peanut butter
1 dried chopped dried apricot
Some chopped dark chocolate
some chopped mix nuts
half chopped bananas

 (B)
1 teaspoon nutella
1 teaspoon dried cranberries
some toasted almond
Some chopped cookies

(C)
1 teasppon praline paste
some toasted hazelnuts
some chopped dark chocolate
some fresh chopped bananas

(D)
Some dried fruits like raisin, cranberries, apricots, figs, dates etc
some fresh fruits like bananas, strawberry, blueberries, raspberries, kiwi etc


July 22, 2015

Homemade Yogurt


Ever since I've learned making my own homemade yogurt, there are no longer store bought yogurt in my fridge as it is too simple to make and yet so yummy. Plain yogurt has become my daily diet as it could be my breakfast, lunch or dinner and even as a dessert after a big meal. Adding maple syrup to sweeten a little and goes with some dried or fresh berries or banana and granola is always my favorite combo. To fill my stomach, mix nuts will be added and that big jar of yogurt become a quick meal for me. My little boy likes to add black current jam in his yogurt with plenty of blueberries. 
It is so good to have homemade yogurt at home as we can have it anytime. 


How I made it: 

Sterilise all the utensil that will contact with the ingredients such as milk and active yogurt.
In a clean glass container, add in 1/4 cup active yogurt asli. Gradually add in 500ml full cream milk and stir with a small whisk to make sure no lumps left and well combine. 
Lid on and place in a larger heatproof container. Pour in hot water until the same height as the mixture. Cover with lid and store in a warm, dark and dry place. Let it fermented for 24 hours. During the fermentation, do not open or touch or move or shake the container. Just let it sit quietly for 24 hours. 
After a day, take out the yogurt from the container and refrigerate for a day before serve. I found the texture is even better after a week sitting in the fridge. 
A successful  yogurt should be like the texture of Chinese bean curd and smooth top. Unsuccessful  one will have very odd smell. 
When serve, scoop out desire amount of yogurtwith clean spoon. Sweeten  it with maplesyrup or honey or jam. Add fruits and nuts and enjoy!

Reserve a small batch of yogurt as the seed of next yogurt making.

July 21, 2015

Red Prawn Durian Ice Cream


Durian season is about to over, I still haven't got enough of it. So I quickly buy more to keep in the freezer for my baking usage. 
Durian Ice cream is one of the sweet staffs that I have made in this season. It is made by good quality and big amount of durian. Everyone thumbs up for this recipe. It is very rich, smooth and so creamy. People ask for 1 scoop only will ask for another. 

180ml whole milk
200ml whipping cream
3 large egg yolks
4 tablespoon caster sugar
1 teaspoon cointreau
200g red prawn durian puree

Warm the milk in a sauce pan. Beat the caster sugar with egg yolk until pale in color. 
Ladle a little of the hot milk mixture onto the eggs and whisk immediately. Continue to add the milk, a ladleful at a time, whisking each well before adding the next. Pour this mixture back into the warm saucepan and cook very gently for a few minutes, stirring constantly with a rubber spatula or wooden spoon until smooth and thicken. 
Add in the durian puree and cook for another 10 minutes until very thick paste. Keep stirring to reduce the heat to avoid the egg cook any further. Sieve the durian custard through a fine sieve and discard any fibre. Then mix with the whipping  cream and cointreau.

Cling wrap the cream after the mixture completely cool down at room temperature. Chill in the fridge for 3 hours before churning in the ice cream maker. Once the custard had churned,  transfer them to an ice cream container and keep in the freezer for few hours until set. Enjoy!


July 10, 2015

Wreathed Red Bean Bread (BM)


After adventure quite awhile with my bread maker using fully automatic function to  produce our daily soft fluffy bread, I have also tried another favorite 65C water roux dough recipe using the program number one just for kneading purposes to produce buns. This experiment was quite success and the texture is equally good like the dough kneaded from my mixer. Here are some buns that was kneaded from my bread maker. There are soft bread like stall bought. 


Just a little tips in the process:

Knead all the ingredients without adding yeast with  program 11 for about 15 minutes with lid open. Restart the bread maker, add yeast and select program 11 again for second kneading for another 15 minutes.
Take out the bread tin from the bread maker cover with cling wrap and proof for 40 minutes. 
Divide the dough to desire sizes of buns then roll them into ball shape. Let the dough rest for 10 minutes before shaping or adding any fillings. Proof for 40 minutes on a baking tray cover with cling wrap then egg wash the dough and bake in a 180C preheated oven for 15 minutes.  


Recipe for the water dough "water roux": Cook 125g water with 25g bread flour at medium low heat, keep stirring until it become thicken and no lumps left. Consistency should be like a thick baby porridge. Transfer to a clean bowl and cover with a cling wrap to avoid skin forming. 


Char Siew Buns

Recipe for the 9 buns (approximately 60g for each dough): 210g bread flour / 56g plain flour / 20g milk powder / 42g caster sugar / half teaspoon of salt  / 30g beaten eggs / 85g water / 84g water dough / 22g unsalted butter / 6g yeast


Coconut Buns

July 7, 2015

Praline Ice Cream


Praline is one of my favorite ingredients for baking. The nutty taste could win over many desserts. It also a great combo with some others ingredient like chocolate, coffee, vanilla, banana, etc etc. 
I made my own praline all these years. Either blend it to a paste to spread on toast, drizzle on my vanilla ice cream or my ice coffee blended. Another option, before it is blended into a paste, I would blend it coarsely to sprinkle on my cakes or any dessert that give extra texture. 
As it's one of my favorite ingredient,  why not praline ice cream, right?!
This praline ice cream taste so good that I can't stop myself eating it. The creaminess with the nutty caramilized flavour is heaven. It's good to be eaten straight or give it extra flavour to go with melted chocolate and sprinkle with toasted hazelnut. 


Recipe: 

370ml whole milk
470mll cream
2 vanilla pod, scored lengthways and seeds scraped out
6 large egg yolks
1 teaspoon vanilla bean paste
1 1/2 teaspoon cointreau
200g praline paste

Miix the milk, 3 tablespoons of caster sugar and the vanilla pod and seeds together in a saucepan. Bring just to the boil, then remove from the heat and leave for a couple of minutes to cool slightly and allow the vanilla flavour to infuse. Discard the vanilla pod. 

In a large mixing bowl, whisk the egg yolks with the 3 remaining tablespoons of caster sugar until pale. Ladle a little of the hot milk mixture onto the eggs and whisk immediately. Continue to add the milk, a ladleful at a time, whisking each well before adding the next. Pour this mixture back into the warm saucepan and cook very gently for a few minutes, stirring constantly with a rubber spatula or wooden spoon until smooth and thicken. Strain the custard through a fine sieve and keep stirring to reduce the heat to avoid the egg cook any further. 

Once the custard slightly cool down, add the cream and vanilla bean paste and mix well. Lastly, add the cointreau if using. It is quite optional but I just like that little flavour inside the ice cream and  I also believe a bit of liqour helps the ice cream set smoothly in the freezer.  Stir in the praline paste until well combine. Cling wrap the custard and chill in the fridge overnight before churning in the ice cream maker. Once the custard had churned,  transfer them to an ice cream container and keep in the freezer for few hours until set. Enjoy!


Ingredients for the praline paste:

120g whole hazelnuts
150g caster sugar
150g water

Lightly toast the whole hazelnuts on a baking sheet.

In a stainless steel sauce pan, combine caster sugar and water. Do not stir. The mixture will reduce. Allow to caramelize and you will see the sides start to color first. Once the sugar reduction has caramelized, remove from heat. Add the lightly toasted hazelnut to the caramel then stir briskly, this should be done very quickly as the sugar reduction will start to harden. The heat from the caramel will warm the nuts and allow the hazelnuts essence to permeate. The nut caramel is then poured onto a greased marble slab. Allow the caramel to cool. Once cool use a spatula to spread and press the nut caramel in an even layer. Flip the cooling layer over. Allow to harden. Use a rolling pin or some other weighty tool to break up the hardened nut caramel. The pieces should be small enough to fit in your food processor. Pulse the food processor until the pieces begin to smooth until a smooth paste.


July 6, 2015

Purple Sweet Potato Bread (BM)


I was quite tempted by a few bloggers about their pretty pinky soft bread some times ago. Only lately I manage to try using purple sweet potato in my bread. Normally I would add potato or orange sweet potato or pumpkin in the dough but this time really bored with the plain and yellow color. So give this purple color a try after I manage to get some purple color sweet potato from the wet market. 
I followed my previous potato recipe but replace with purple sweet potato. The outcome is really soft and of course the lovely pinky color cheers me up in the early morning. Thanks for Honey Bee Sweet, Reese, and some bloggers inspiration.  Sometimes,  colors really can make lots of difference. 


I wasn't believe bread maker could produce a good fluffy soft bread but I was wrong. As long as the recipe is right with the bread maker program, it is equally good as manually made  and even bettee than stall bought. Of course, got to gone through many experiments to get there. 


Ingredients for Panasonic bread maker program 3 with medium crust setting. Process takes 4:20 minutes to complete.

165g bread flour
60g plain flour
23g caster sugar
1/4 +1/8 tsp salt
1 egg yolk
55g purple sweet potato  (steamed and mashed)
110g cold water
23g unsalted butter
3g yeast

July 3, 2015

Durian Mousse Cake II

A good slice in the morning to start my new day...

Another durian cake for this season. The durian souffle cheesecake sold out in no time during the last weekend charity sale so this weekend I am going to add another type of durian cake for sale again.
Recently, my car, my house, my fridge, my body almost smell durian everyday. Perhaps I will get vomit at the end of this durian season, would I ? Don't think so as I am such durian manic.

A good slice in the evening to reward myself a hard working day....

This melt in the mouth durian mousse cake tasted wonderful. A picky person like me very particular about gelatin really enjoy this dessert without tasted any gelatin added in. I choose gelatin leaves for this recipe and used very little to produce a soft set consistency. If you like it to be harden, feel free to add one or two more gelatin leaves. 

Recipe for 9 inches cake (about 1.5 kg)

For the cake base:
2 pieces of 8 inches sponge cake (from Peach Cloud Cake recipe)

For the durian mousse:
400g durian flesh (pureed) I used red prawn durian
6 pieces gelatin leaves
400ml whipping cream
1 tablespoon lemon juice
4 egg yolks
100ml milk
80g caster sugar
  1. Put the gelatin leaves in cold water. In a sauce pan, warm the milk with sugar until the sugar completely dissolved. In a large bowl, add in the egg yolks then gradually pour the warm milk to mix with the yolks. Pour the mixture back to the saucepan and cook gently until thicken. Mix in the durian puree until combine. Cook a little more until the durian custard warm enough. Turn off the heat then add the gelatin (squeeze out any water of the gelatin before adding in). 
  2. Add lemon juice until well combine. Sieve the durian custard through a strainer.  Set aside to cool down.
  3. Whip the whipping cream until stiff peak. Fold it into the completely cool down durian custard till well combined.
  4. Place one piece of sponge cake on a 9 inches cake pan lined with transparent paper at the side. Pour half of the durian cream into the cake pan. Chill in the freezer for 10 minutes. Then add another piece of sponge cake on the top. Pour the remaining durian cream on the top and layer until smooth. 
  5. Chill in the fridge at least 6 hours or overnight before serve.
  6. Brush a thin a layer of glazing gel (mix with same quantity of water (this is optional then portion with a hot knife for every slice.
  7. Best served cold. Enjoy!