

My very first attempt on Danish pastry, Croissant. So fulfilling and joyful after all.
Here is my very first attempt on Croissant. It wasn't easy as the process very time consuming as well as the weather really give me a big challenge. I was like running a marathon with the hot weather to roll out and fold in the pastry to avoid the butter melted in very short time.

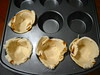
It's ready to be baked in the oven and I was so exciting for the result.
After all, I must say it is truly worth the effort and so fulfilling at the end result.
I love to eat croissant, and crazily miss the Delifrance Croissant Sandwich. Of course I could get it easily from the cafe but making it on my own is full of enjoyment through the process. I know that there are so much room to be improved and from this experience I should be able to do better for my next Danish Pastry. Practice make perfect!

The layers of soft crumbs is so buttery yet the flaky crust is so delicious and that really make me smile and I knew that I've got there.
I've got a very good tutorial from a video clip of YouTube. I studied and watched over and over again for many times before I get started. This lady Stephanie Javorski of Joyofbaking.com has given very clear description on the video that had help me get this successful result just at my first attempt. I don't think I can give such a good and very detail yet precise description of the process, so do visit her video clip for full description and remember all the tips that she is giving to make sure everything go smooth during the process.
The following recipe and some note is only for my future reference to remind myself some tips like measurement and things that I might forget on my next attempt.
Lastly, I am so happy that I finally able to make my own croissant. It taste so good and so satisfied after all.

The result told me that it worth the effort for the long process
Recipe (makes 11 croissant):
For the dough:
475g plain flour
65g caster sugar
10g salt
6g instant yeast
25g unsalted butter
240g water
30g cream
225g unsalted butter
For the glaze:
2 large egg yolk + 1 large whole egg
- Mix the dough ingredients together except butter in a bread maker or electric mixer attached with dough hook. Add in butter when the mixture come together. Knead the dough until smooth.
- Proof the dough for one hour at room temperature covered with cling wrap.
- Prepare the butter sheet shown below and refrigerate until hard and ready to use.

Cut the 225g butter into 12 equal portion. Place on a baking sheet drawn measurement line with 10 inches x 7 inches (25cm x 18cm)
- After an hour proofing, bring the dough to a floured surface. Roll out into 14 x 10 inch (35 x 25 cm) rectangle. Sprinkle some flour on the top and cover with cling wrap. Refrigerate for at least 6 hours or overnight.
- To laminate the dough, remove the dough and butter from the refrigerator. Bring the dough to a floured surface. Tear off the baking paper from the butter and place at the center of the dough. Fold two side of the dough into center and seal all the edges tightly.
- Roll out the dough into 22 x 8 inch (55 x 20 cm) rectangle vertically with even thickness. Flour the work surface and dough when working out the dough. Make the first fold of the dough by folding lengthwise into thirds.

- If the butter started to melt, place into the refrigerator for an hour. Or, do the second fold by rolling out into to 22 x 8 inches (55 x 20 cm) rectangle vertically with even thickness. Make the second fold of the dough by folding lengthwise into thirds. Refrigerate for one hour.
- Take the chill dough out from the refrigerator. Again, roll out into to 22 x 8 inches (55 x 20 cm) rectangle vertically with even thickness. Make the third fold of the dough by folding lengthwise into thirds. Chill the dough for one hour.
- Remove the chill dough from the refrigerator and roll the dough into a 16 x 9 inch (40 x 23 cm) rectangle vertically with even thickness. Cover with cling wrap and refrigerate for 30 to 60 minutes. The dough can be left in the fridge or freezer and ready to be used.

- Make a croissant template with cardboard paper shown below.

Prepare a croissant template on a cardboard with
9.5 cm across the base and about 9 inches (23 cm) high.
- Take out the chill dough from the refrigerator and roll out into 24 x 9 inch (61 x 23 cm) rectangle.
- With the triangle template attach on the dough as a guideline. Cut out a triangle dough with knife.
- Lengthen the dough by rolling out with a rolling pin. Cut a small slit in the center of the wide end of your dough. Starting at the wide end, roll the dough into a crescent shape. Place on a baking sheet seal side down and repeat with the remaining triangles.
- Glaze the dough with egg wash and cover with a cling wrap. Proof the dough for 2 hours and preheated the oven to 200C.
- After 2 hours, glaze the dough with egg wash again and bake the dough for 20 minutes or until golden brown. (if using two tray, rotate the tray within 10 minutes)
My little note:
- Proof the dough for 1 hour.
- Butter sheet size 10 inches x 7 inches (25cm x 18cm)
- Roll out the dough into 14 x 10 inch (35 x 25 cm)
- Chill dough 6 hours or overnight.
- After laminate dough and butter, roll out the dough 22 x 8 inch (55 x 20 cm) , chill for 1 hour
- Second fold, 22 x 8 inches (55 x 20 cm)chill for 1 hour
- Third fold, 22 x 8 inches (55 x 20 cm) chill for 1 hour
- Roll out into 16 x 9 inch (40 x 23 cm)
- Refrigerated for 30 - 60 minutes or overnight (ready to use)
- For croissant size, roll out to make 11 pieces. 24 x 9 inch (61 x 23 cm)


.jpg)


2 comments:
Hi Grace, your croissant looks so good, well done! Thanks for sharing the detailed instructions, I hope to try making them one of these days ;)
Hi HHB,
Nice to hear from you. Thanks for dropping here. Please look for the original recipe. Mine is not precise and may be too roughly described that just for my own reference 😊
Post a Comment